Alright, people settle in for a long post. Its been exactly one month in the making. Can you guess from the title and the pic above? That's right!!! STAR WARS!!! Edible star wars !!!!
So this year for my Festival of Trees project, I decided to do Star Wars. I know it might not be the most festive idea, but the theme was "Under the Tree" so I mean.... come on... it sort of works? Right? Yeah? Forest of Endor? Lots of trees? Whatever, hopefully it will help raise lots of moolah for the University Hospital! and that's what it's all about. That and challenging myself to learn something new every time. So get comfy, and get ready for the play-by-play of how this idea became a reality. Don't worry, there will be LOTS of pictures.


So on Oct 29th, I pick up the fateful MDF board from the lovely organiser. Approximately 2' x 2' and a glorious blank canvas. Not for long. Lemur came over and we set up the main structure for the trees and the Death Star. A lot more planning went into this than i usually have to do. it was the first time i have done major structural support, but after the tree house fell over on my Simpsons project, I had to make sure there was no chance of that! Also, the Death Star was going to be above the 2' height restriction, which was O.K., as long as it was removable for transport.... CHALLENGE! 8) Once all the dowels were secured, I covered everything in foil... just to make it into that blank canvas again

First, I covered the tree dowels in royal icing, and the a thick layer of Rice Krispie treats. Then I cover the cereal treats with fondant, which I marked with a wood texture. Then I drilled holes at an angle to put the cinnamon sticks in. The cinnamon was meant to help support the gingerbread platforms and huts that were going to sit on top of this set up.
Meanwhile I baked off a LOT of ginger bread. platforms, walls, bridge pieces, and lots of spares in case of breakage.


Once the "trees" were set, I covered the platforms with royal icing and placed them in position above the forest floor. 8) This seems like a fairly straightforward process, right? Well, lets just say there was a bit of a learning curve. In the end all the platform were just fine. The biggest issue I had was the main area, with a BIG platform stretching between two trees. I broke 3 pieces trying to get it to work. Finally, I made it in two pieces and used royal icing to "glue" them together in mid air! I needed a bit of support to make this happen... literally. In the end it all worked out, and I was amazed my design worked.
I mean.... Um.... of course it worked!

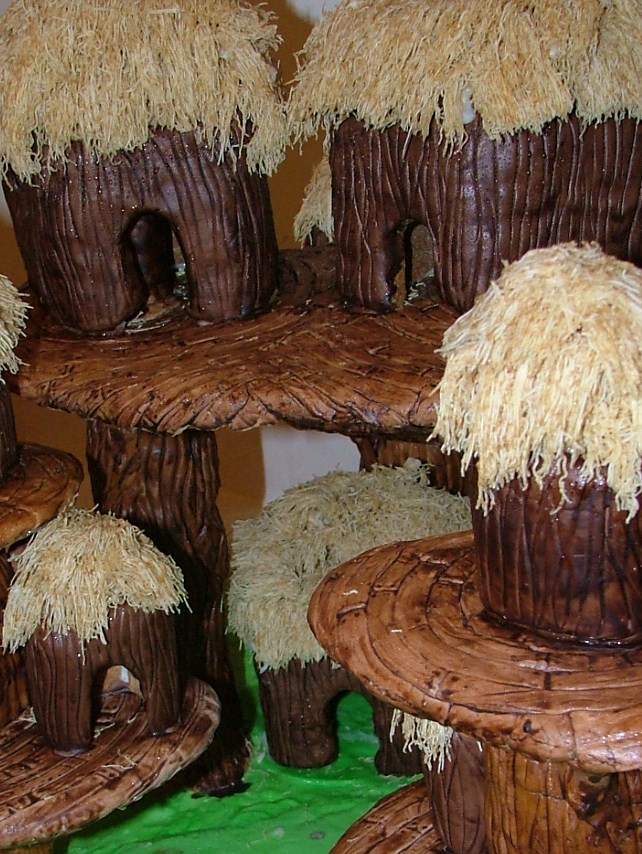
Once all the gingerbread was set in place, I covered it in fondant with a wooden plank design. I painted all the "wooden" elements with a bit of colour to make it more rustic looking, and then let it set up.
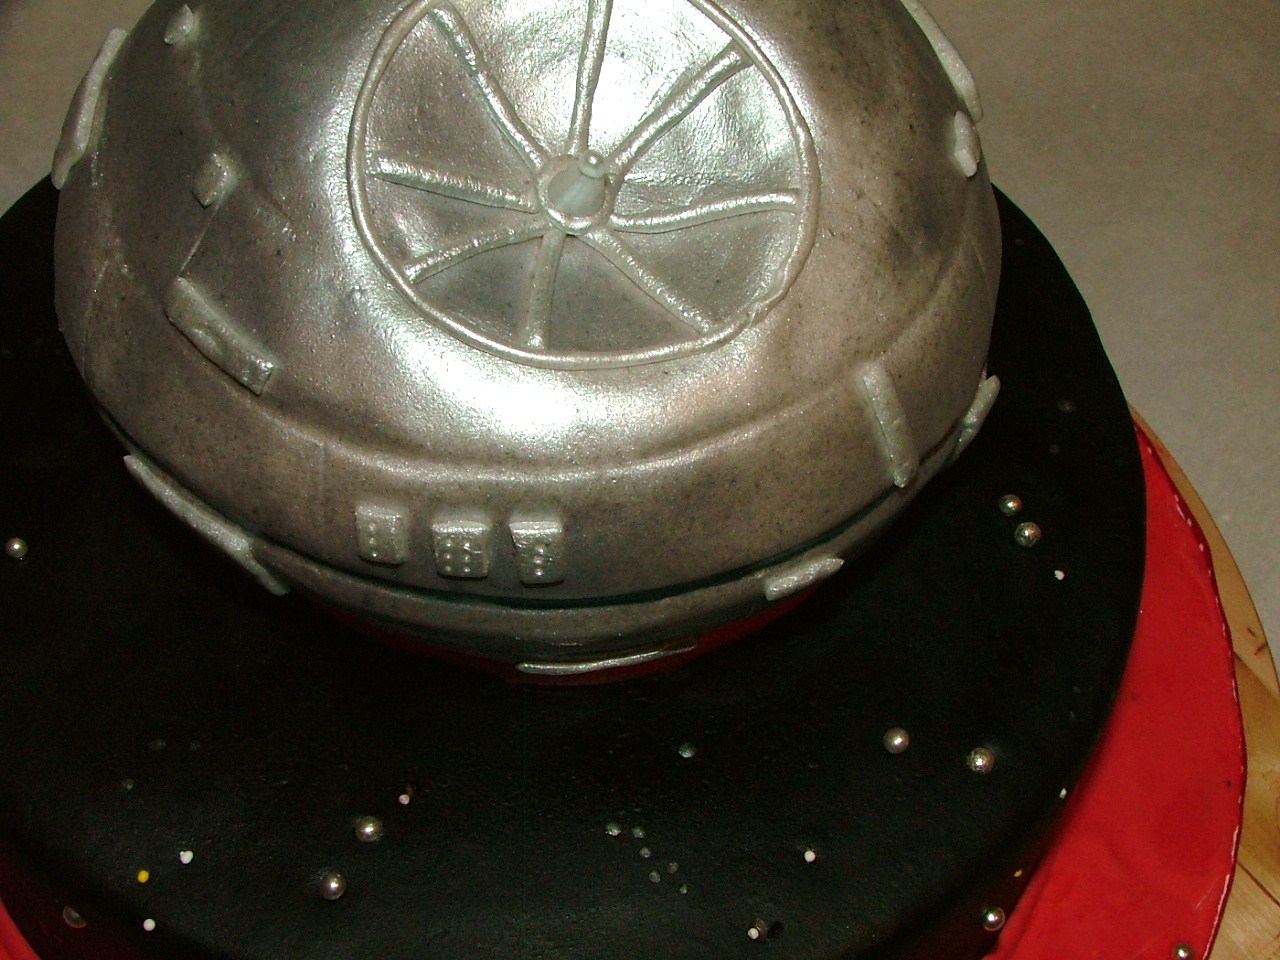
In the meantime..... DEATH STAR!
Humble beginnings for this formidable task. A giant ball of Rice Krispie treats, roughly shaped like the unfinished death star from Return of the
Jedi, covered in grey fondant and left to dry out.
One of the coolest parts of this project was
Lemur teaching me how to solder the wires together for the custom LED lights we used in the death star. He was absolutely brilliant in his plan to make it light up, and shoot. We (mostly He) wired up a rig of green LED lights, and a battery pack to light 'em up! As well as cutting some fibre optic rods to carry the light. BRILLIANT. I cant say enough great things about my sweet friend, or thank him enough for his help, inspiration, and support.

My trusty dremel makes another appearance to make the appropriate space for the lights and necessary wiring. Then I (for what seemed like eternity,) patiently worked all the little lights into their new homes and secured them with fondant. About this time i started giggling a lot and getting really excited. I may have been mildly ridiculous.
So at this point, my Death Star is setting up, my village is ready to be assembled. I built all my little huts, then discovered it looked completely off proportionally, so I remade a bunch of them to much improved results. then I covered the houses with fondant and textured it to also look like wood. I used shredded wheat to make thatched roofs on the huts once they were in position.
While this step settles, I start modelling my Ewok brigade. My first attempt to make them with chocolate.... FAIL!
I learned from my mistakes and tried again.... and then these little guys were born!!!
Really? Seriously? Can you resist this much adorableness?
NO WAY!
I was giggling my butt off, and back to being just a bit ridiculously excited. then it was time to place them around the village! 8)
It was finally time to start final assembly. after spending all my free time for a month on the pieces, it became a whole.
After making the (slightly crooked) etchings into the death star, giving it a couple coats of "paint," securing the fibre optic rods, and hiding the wires, I did a little dance. Finally it was all together, and it was working!!!!
I was a bit sad, cause it didn't turn out as perfectly as I had envisioned. But after awhile, I accepted the imperfections. I would rather challenge myself and push my limits, learning along the way, than make a safe design that is perfect. So by moving the gingerbread up off the ground, i didn't think it would leave the ground looking so empty. I scrambled to fill some of the space up. I also ran out of time to completely cover the wires and finish the bottom area of the Death Star support. My lines were crooked on the Death Star. 8( Once i accepted these shortcomings, it was easier to just focus on the positives and be proud of what i was able to accomplish!
Far from perfect, but still, pretty dang cool!!!
My lovely friend Lara ( A marvelous chef, baker and amigo, BTW,) came over to cheer me on in my final moments of panic, and she even helped me deliver my project and set it up at the Shaw Conference Centre.
A tradition I have decided to continue is "hidden" giggles for people who take the time to look closer. Hiding under the main hut is Yoda, Chewie, and the crash site of a hang gliding ewok.
Lots of little details bring it all together, and the Ewoks chill out in their village.

When it was all said and done, I was exhausted. and it was worth it all. I love doing this project every year. They need more people to join in the fun. All skill levels are welcome, so why not contact them an see if you can get on board for next year? Call or email Elaine
here! It is so rewarding! I am completely willing to help anyone i can, who knows... maybe i will work on two again next year!
C3PO and R2D2
My favourite Ewok, proud and strong... 8)and did i mention CUTE!!! I mean fierce!
My last addition was my favourite. I cant help but smile when I look at this happy fella, so proud of his Stormtrooper helmet collection, lol. The helmets were a much more difficult thing to make than anticipated, but i think it more or less works. if you don't smile when you see him... well : - p
and finally the whole kit and caboodle


 Once the "trees" were set, I covered the platforms with royal icing and placed them in position above the forest floor. 8) This seems like a fairly straightforward process, right? Well, lets just say there was a bit of a learning curve. In the end all the platform were just fine. The biggest issue I had was the main area, with a BIG platform stretching between two trees. I broke 3 pieces trying to get it to work. Finally, I made it in two pieces and used royal icing to "glue" them together in mid air! I needed a bit of support to make this happen... literally. In the end it all worked out, and I was amazed my design worked.